THREAD TENSION ISSUES
Hello, are you one of the many that are having problems with getting your thread tension set proper or having trouble getting the top thread tension adjusted to the correct tightness or setting. I have helped several people in finding out what their problem was and most to the point of just putting the machine back in storage because they just could not get it to work.
I had a lady who had not sewed in many years, she purchased a machine from me and when she got it she set it up and began to sew. She noticed that the top thread tension was not tight and so she adjusted the tension but it stayed the same so she went back through the manual step by step and could not find the problem. Now she was ready to pull her hair out, she emailed me and I gave a few suggestions, still she was having problems, so I suggested a few other things, to make a long story short, it ws that she had put the bobbin in backwards.
I am going to tell you a few things to check if you are having thread tenison issues.
1. Thread weight in spool and bobbin may cause tension to be different need to be same weightMake s
2. Make sure you have the machine threaded correctly
3. Make sure thread is going through the wire or spring correct on tension
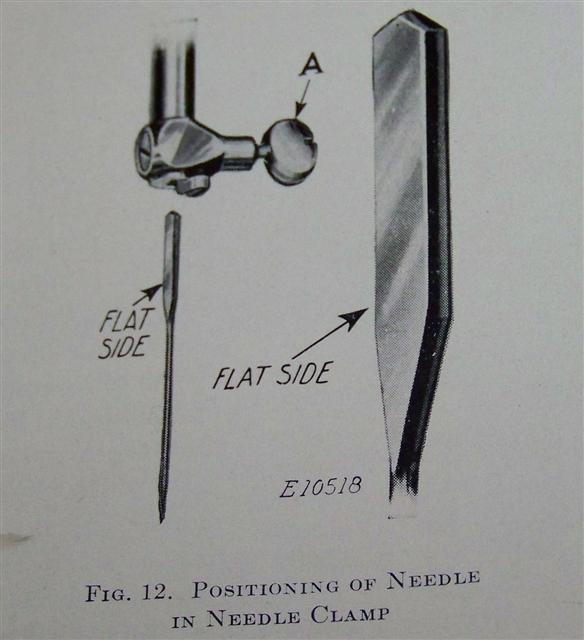
4. Make sure needle is inserted correct flat side of needle facing correct direction for the machine you are using (they are different) and that it is a new needle not an old needle these issues can cause skip stitches and other problems.
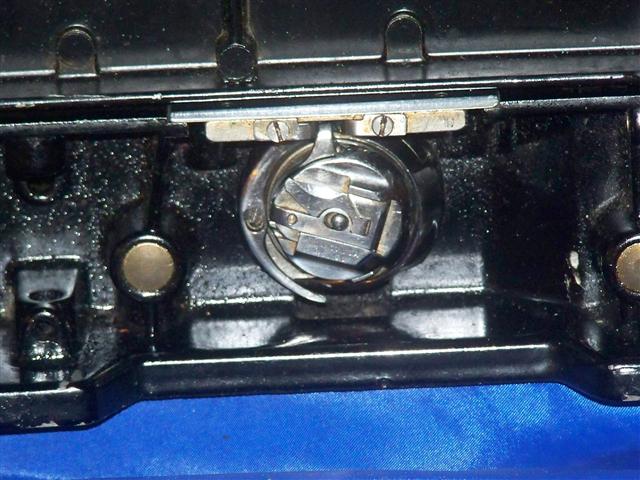
5. Make sure the little finger on rotary is in space on bottom of needle plate on the singer 221 featherweight, this can cause all kind of problem.
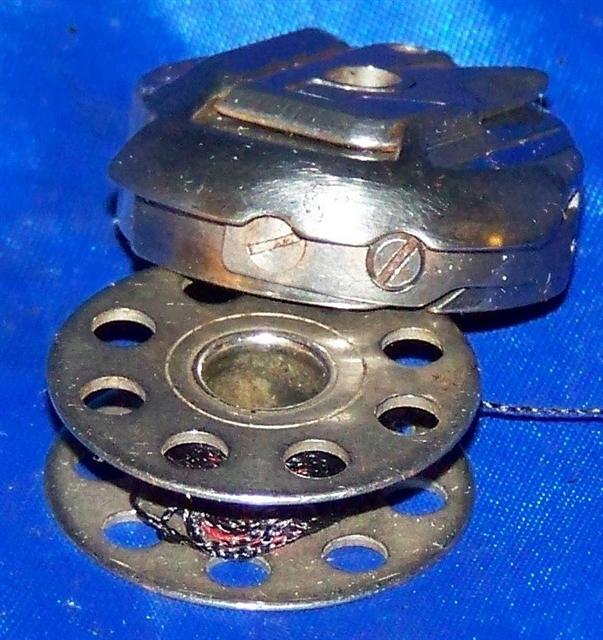
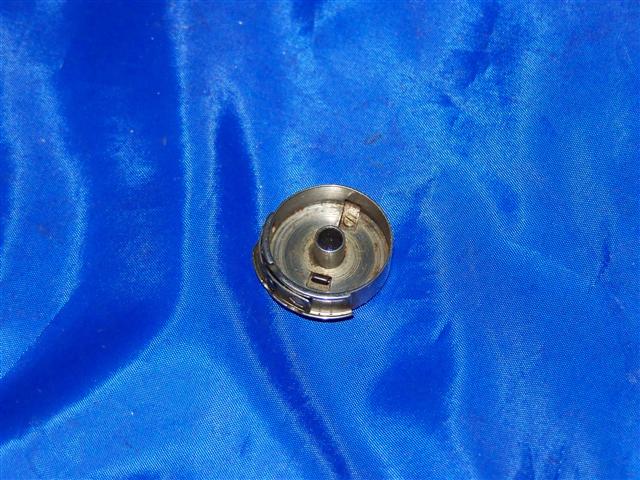
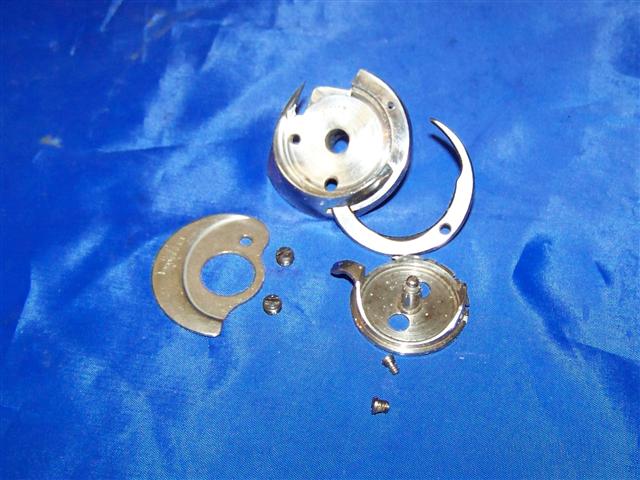
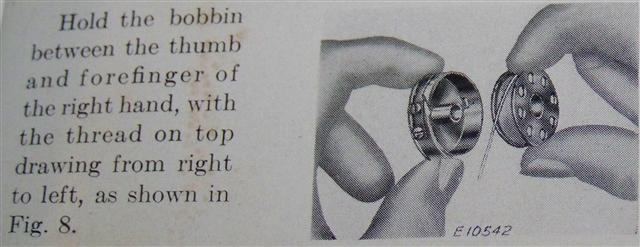
6. When putting the bobbin in the bobbin case make sure you put the bobbin in so the thread comes off bobbin counterclock wise and the the thread is pulled into the slot on the spring of the bobbin case, if this is not correct it will cause loose stitches because the spring is not doing its job. You may also need to adjust the little screw on the bobbin case and I have received machines and the bobbin case has build-up inside the case and causing the bobbin not to turnm freely.
There are a lot of little things that can cause your tension no to work correctly and cause loose stitches, skip stitches, thread to bunch up, so remember to look for these little things and if you are still having problems make sure your machine is clean and that the rotary, bobbin case, thread tension, parts are not missing or have broken parts. I had one machine that the hook on the rotary had a very little piece of the hook broken off. If you still can not figure it out, I am willing to give it a shot, just email me or give me a call.
Hello, if you are reading this you are having more problems and you have adjusted the thread tension as far as it will go and the thread is still bunching up on the bottom of the material. You're really flustered and ready to pack it up, well I am going to try and walk you through ways to fix th is problem. We have to remember that it is a machine and needs to be cleaned and maintained same as any machine. You take your car in and have it looked at and have a tune-up so that it runs smooth and gets you from point A to B right?
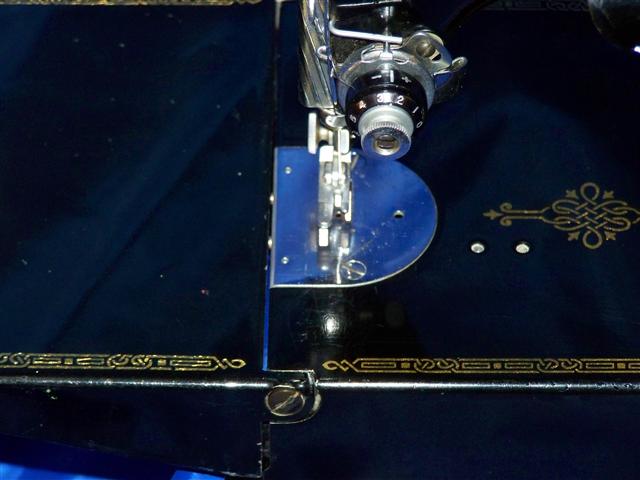
1. Check to make sure machine is threaded correctly, make sure you have the thread in the disc going around and up through the take-up and down through the thread guides.
2. Check needle, some of singer machines insert with the flat side of needle faces front of (Pictures from 1941 Singer Manual) machine, 15-, 201-2, 221, 222, 301, and other and the 66, 99, and a few others are opposite, and make sure needle is new, has no hooks, tip is not flat.
- Check rotary that the finger is in space on bottom side of needle plate
(B2 and A2)
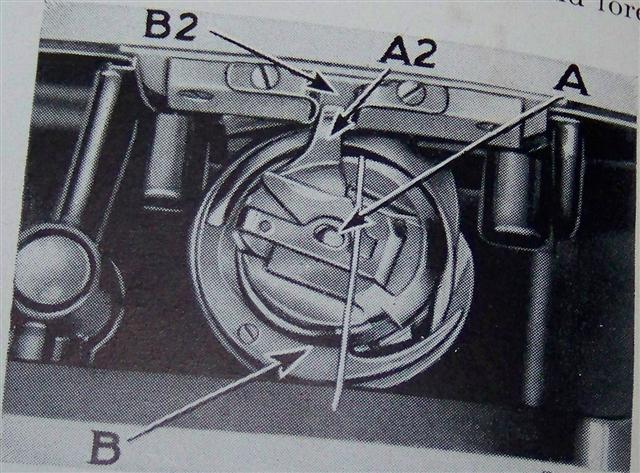
(Pictures from 1941 Manual Singer Manufacturing Co.) and that the rotary hook is in great conditionand is free of thread. You may have to loosen the two set screw and remove rotary and take apart to
remove any thread that may be wrapped around it and put a drop of sewing machine oil on the moving
parts attach back to machine.
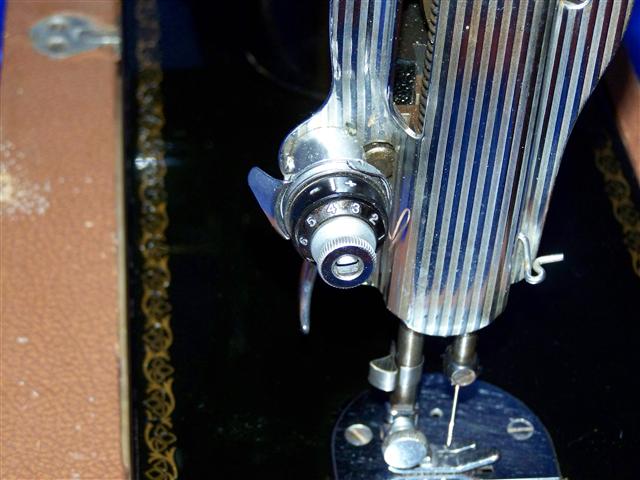
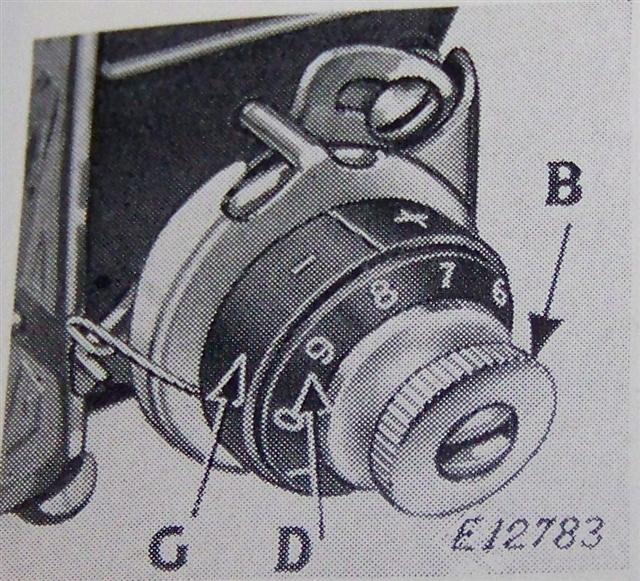
Make sure bobbin in bobbin case correct drawing string clockwise off of bobbin. Sew a few stitcheswith tension set around 3 ½ - 4 on setting, if you still have thread bunching up on bottom side ofmaterial we need to concentrate on the thread tension assembly. When you lift the presser footlever to up position does the thread tension release? Check your spring does it have good tension oris it weak? When you turn the dial does it turn all the way or does it catch in spots before turning from0-9? Ok, if all these check out and are working what we do next, I have found that the thread tensionis a touchy part we may need to take it off the machine and clean & re-adjust it.
Take off the face plate and loosen the set screw, take off the little screw holding the chrome threadguide to the tension assembly and take a screw driver and insert into tension with fingers pull lightly
towards you while turning tension back and forth with screw driver (If your not comfortable doing thisthen you may have to take to repair shop) until you have it removed.
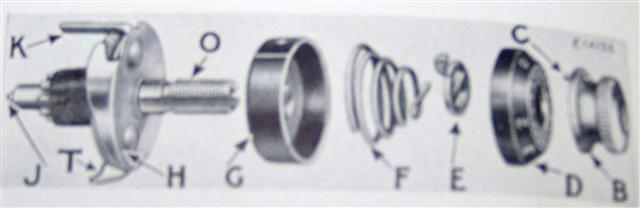
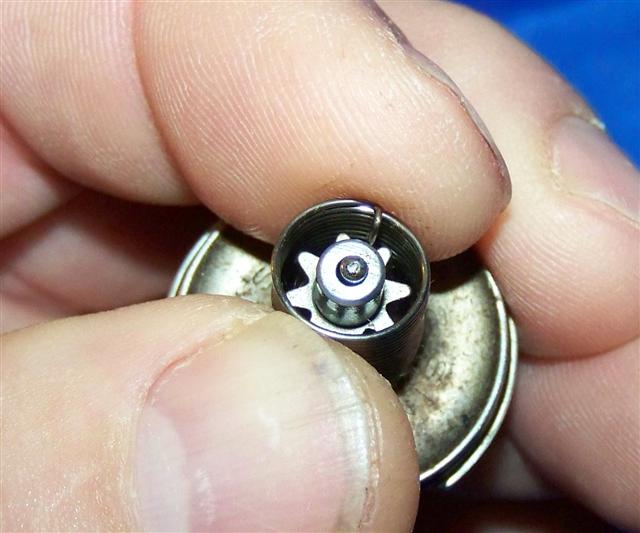
The first thing to do is if you have a manual, get it out it has a picture of the tension and its parts. Have this handy in case you are unsure of how it goes back together. Now, since you haveit out clean the machine area of the tension first then take apart the assembly by unscrewing the thumb nut and lay ou the parts in the order they cam off so you get it right when you put back on.
Clean the parts as needed from dirt, oil build-up, and if your not comfortable doing this take it to a repair shop. When you have cleaned it and all parts look to be in good shape put back together but before putting back in your machine check the spring "T" to make sure there is some tension and that it is working correctly.
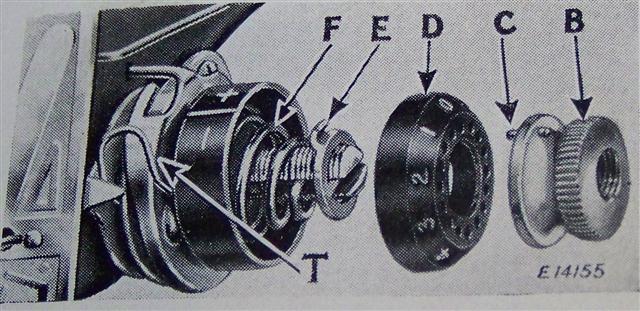
If it doesn't feel to have any tension or is light you can pull the spring up and adjust the left one tooth as needed.
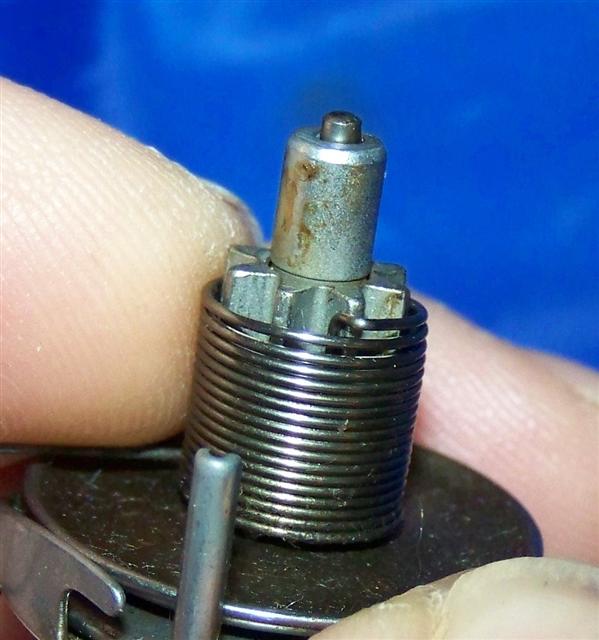
I just had a machine that I was sewing with and when I turned over the material I was sewing, the top thread had made a mess on the bottom sside. I adjusted the spring and fixed the problem and the machine sews great now. If your machine is clean unlike this tension which as you can see is dirty and needs to be cleaned but adjusting the spring fixed the machine. There are so many things that can cause problems and you just need to take the time and clean and adjust these parts and your ready to sew.

There is one more thing if this doesn't fix the problem the part "E". I have seen the center of these bent out and is causing the tension pin "J" not to protrude out far enough to work proper and may need replacing. This usually happens from pulling up to hard on the presser foot release lever. Take it off machine and lay on bench take a small punch and lightly tap it towards the direction of the machine will fix the problem but be sure not to hit to hard or you will break it. I hope this was helpful!
duane